Appointments: Quickly Move Email to Your Calendar
The Schedule button will automatically create appointments from email. Highlight an email, click Schedule, and the message contents will be pasted into a new appointment. As in the creation of Tasks, you can set Project and message processing options while you are creating the appointment and it will appear in the conversation's MessageContext.
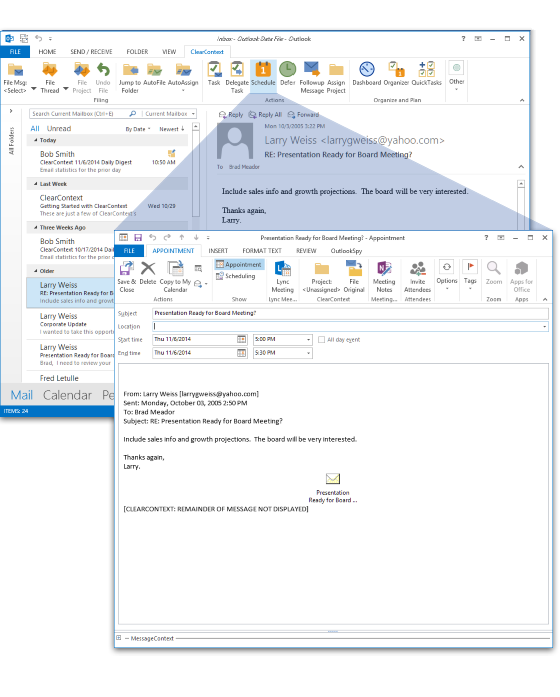
Project Assignment
ClearContext will query for a Project assignment when creating an appointment. This allows you to view this information by Project in the ClearContext Dashboard. Turn this feature on/off via Project Assignment on New Appointments at ClearContext > Options > Tasks/Appts.
File Original
![]() When creating an appointment from an email, ClearContext can
automatically file the original message, moving it out of the
Inbox and saving the need to deal with it again. Enable File
Original on the appointment toolbar and ClearContext will move the
message you are creating the appointment from into the Project folder
you select. ClearContext remembers this option the next
time you create an appointment.
When creating an appointment from an email, ClearContext can
automatically file the original message, moving it out of the
Inbox and saving the need to deal with it again. Enable File
Original on the appointment toolbar and ClearContext will move the
message you are creating the appointment from into the Project folder
you select. ClearContext remembers this option the next
time you create an appointment.
Appointment Options
The following options may be changed in ClearContext > Options > Tasks/Appts.
- By default, ClearContext truncates the text of long emails and attaches a copy of the message when copying creating an appointment or task
- When appointments are created from an email, a category can be assigned to mark the email as having had an appointment created from it.
Custom Forms Support
If you would like to use a custom Outlook form for task generation when pressing the Schedule button, specify that form via ClearContext > Options > Tasks/Appts. Under Create Tasks and Appointments with Custom Forms, add the message class you wish to use for Appointments. For example, IPM.Appointments.MyApptForm.